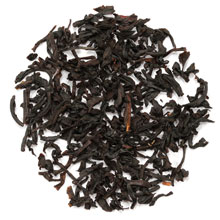
Recipe: Peanut-Caramel Mousse Cups with Tiger Eye Tea
October 04, 2023
by Maggie Frank


So, the idea hit to add peanuts into this flavor profile, and voila! The recipe for peanut-caramel inspired Tiger Eye Mousse was born. This recipe requires a little time with all it's components but it's so worth it.
In this recipe we will make Tiger Eye Tea infused mousse. Perfect on it's own. But, when you layer the caramel and chocolate on top it's to die for. The caramel is exactly like the peanut filling you find inside an actual snickers bar. Then topping it all off with a hard layer of dark chocolate makes for the most sophisticated and satisfying treat. You can even make these mousse cups in small shot glasses to serve at a Halloween party! I know I plan on it.
Peanut-Caramel Mousse Cups with Tiger Eye Tea Recipe

Prep and Cook Time: 1 hour
Peanut Caramel Ingredients
1 cup sugar
1/4 cup water
1/4 teaspoon cream of tartar
2 tablespoons smooth peanut butter
2 tablespoons heavy cream
1/2 cup roasted peanuts
Mousse Ingredients
3/4 cup white chocolate
1 cup heavy cream
1/4 cup cream cheese, room temperature
1/2 tablespoon Tiger Eye
Topping Ingredients
1/2 cup dark chocolate chips
1 teaspoon coconut oil
Peanut Caramel Directions
1. In a small sauce pan combine sugar, water, and cream of tartar. Make sure you're using a very clean, grease-free pot. Any contaminants in the sugar can cause the caramel to prematurely crystalize.2. Use a wet paper towel or pastry brush to clean the edges of the pot, making sure it is free from the sugar mixture.
3. Next, heat the sugar mixture over medium heat. Do not mix during this process, just let the sugar start to cook .
4. While your sugar is cooking measure out your cream, peanut butter, and peanuts. Once the sugar is cooked to the right color the next steps need to go quickly.
5. With your pre-measured ingredients set aside, return your attention to the sugar. It may start to darken unevenly, but resist the urge to mix it. You can gently tilt the pot to encourage even coloring.
6. Once your sugar has reached a rich amber color remove it from the heat.
7. Pour in the cream and use a rubber spatula to immediately and quickly combine. Be careful because the caramel will steam and bubble.
8. One the cream is mixed in, add the peanut butter. Once combined, add the peanuts and stir one last time. Set aside to cool slightly.
Tiger Eye Tea Mousse Directions
1. Grind your tea using a spice or coffee grinder and set aside.2. Melt the white chocolate in a small microwave safe bowl. Melt for only 10-15 second intervals to prevent the white chocolate from burning. Be sure to mix in-between. Set aside.
3. In a large mixing bowl, whip your heavy cream using an electric mixer. Mix to medium peaks, then add cream cheese and whisk again to stiff peaks.
4. Add in melted white chocolate and the tiger eye tea. Whisk again until smooth.
Chocolate Topping Directions
1. Melt the white chocolate in a small microwave safe bowl. Melt for only 10-15 second intervals to prevent the white chocolate from burning. Be sure to mix in-between. Add oil, mix well. Set aside.Assembly
1. Add mousse into a piping bag and pip into glass cups to make personal sized treats. You can also use a spoon to distribute the mousse and then just tap the glass lightly on the table to prevent any air bubbles.2. Once the mousse is pipped, use to small spoons to scoop and spread the peanut caramel layer out over the mousse. Be gentle because you want to have distaint layers between the mousse and the caramel.
3. Spoon and spread the chocolate layer over the caramel and then top with more peanuts before the chocolate sets.
4. Let rest in the fridge until you're ready to serve!
